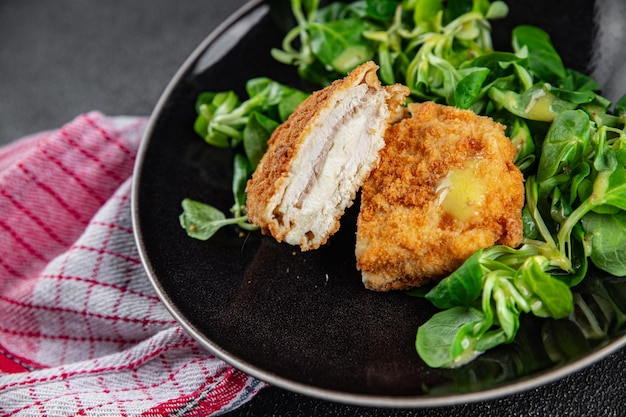
"Crispy Chicken Kiev! It’s mealtime and you’re looking to kick things up a notch? This dish is the answer! Imagine chicken filled with herby compound butter, breaded and fried till it’s golden. The outside is crispy, and the inside is juicy and flavorful. Perfect for any occasion, really.
Compound butter is the star of the show here. I used to think butter couldn’t get any better, but then I added herbs and flavors to it, and wow! It adds a perfect finishing touch to any dish. You should try it on roasted chicken or your favorite bread!
So, what exactly is Chicken Kiev? Well, its origins are debated – is it Russian, Ukrainian, or French? Regardless, it’s definitely tasty. It all starts with boneless chicken breasts seasoned with some salt and pepper. Then, we introduce a slice of compound butter inside each chicken piece. This butter is a hidden flavor bomb, made by mixing herbs and spices into soft butter and then chilling it till it’s firm.
Next, we work on the golden coating. The chicken pieces are dusted with flour, dipped in beaten eggs, and then rolled in Panko breadcrumbs mixed with Italian seasoning. A quick fry in hot oil gives them a beautiful golden-brown crust. But we’re not done! A quick trip to the oven ensures the chicken is cooked through. The result? A mouthwatering combo of tender chicken, herbed butter, and a satisfying crunch.
You’ll need a few simple ingredients to make Chicken Kiev. It’s all about the crispy exterior, juicy chicken, and a surprise burst of richness from the butter filling. Here’s what you’ll need:
- Compound Butter: Special butter mixed with herbs and spices, it melts inside the chicken, making it super tasty.
- Boneless Skinless Chicken Breasts: Chicken pieces without skin or bones, easy to manipulate and wrap around the butter filling.
- Salt and Pepper: Our trusty seasonings that add the first layer of flavor.
- Flour: Dusts the chicken to make it nice and crispy.
- Large Eggs, Lightly Beaten: Helps breadcrumbs stick to the chicken.
- Panko Bread Crumbs: Crunchy coating that makes the chicken crispy when fried.
- Italian Seasoning: A mix of herbs and spices that add extra flavor.
- Oil for Frying (Vegetable or Canola): For that crispy, golden exterior.
Making chicken Kiev takes a bit of time and effort, but trust me, it’s worth it! It’s a delicious dinner that everyone will love, and perfect for special occasions. It even has that restaurant-quality taste that will have everyone wanting more.
Make the compound butter ahead of time and chill it before assembling the chicken Kiev. Flatten the chicken breasts on a cutting board, season both sides with salt and pepper, and place a slice of the chilled butter in the center. Fold the chicken over the butter to form a log and wrap each piece tightly in plastic wrap. Chill the wrapped chicken logs in the freezer for about 2 hours.
For the breading station, add the flour, beaten eggs, and Panko breadcrumbs mixed with Italian seasoning in separate bowls. Dip the chicken log into the flour first, then the eggs, and finally roll in the breadcrumbs. Preheat the oven to 400 degrees Fahrenheit and heat oil in a large pot to 350 degrees Fahrenheit. Deep fry each chicken log for 3-4 minutes until golden brown on all sides, then transfer into a casserole dish and bake for 20 to 25 minutes.
Here are some pro tips for the perfect Chicken Kiev every time: chill the butter well before using, consider adding a small piece of cheese with the butter for a gooey surprise, freeze the chicken before breading to help it hold its shape, pat the breadcrumbs gently onto the chicken for an even coating, let the chicken rest before cutting to keep the juices inside, and finally, complement the richness of the chicken with a creamy sauce like garlic butter, alfredo, or hollandaise.
As for leftovers, store them in an airtight container in the refrigerator for 3 to 4 days or in the freezer for up to 3 months. Reheat in the air fryer at 390 degrees Fahrenheit for 8-10 minutes, or in the oven or microwave. Enjoy!"